↓↓クリックして頂けると励みになります。
【50 | コンパイルテスト】 << 【ホーム】 >> 【52 | Heroku postgresの設定】
いよいよ作成したアプリケーションをherokuへデプロイする時が来ました。
Herokuへの接続の確立、HerokuとGithubの接続、デプロイの方法等、順に解説していきます。
まず、HerokuのダッシュボードページでRubyよりも先にnodeをインストールするよう指定をします。
これを行なっておかないと、Push時にエラーが出てしまいます。
Herokuのページで「Setting」に移動します。

下部にある「Buildpacks」で「Add buildpack」をクリックし、「node」が「Ruby」よりも先にくるよう追加してください。


Herokuに接続してGithubのファイルをPushしますが、方法は2通りあります。
一つはCLIを利用してコマンドラインで接続する方法、もう一つはHerokuのWebページで行う方法です。
まずはCLIを利用する方法から解説します。
「heroku CLI」をインストールします。
コマンド
brew tap heroku/brew && brew install heroku
xcodeのバージョンが古い場合、以下のようなエラーが出ます。
==> Installing heroku from heroku/brew
Error: Your Command Line Tools are too outdated.
Update them from Software Update in System Settings.

If that doesn't show you any updates, run:
  sudo rm -rf /Library/Developer/CommandLineTools
  sudo xcode-select --install

Alternatively, manually download them from:
  https://developer.apple.com/download/all/.
You should download the Command Line Tools for Xcode 14.3.
このエラーの通り、まずsudo rm -rf /Library/Developer/CommandLineToolsとコマンドを打ち、古いライブラリを削除します。
次にsudo xcode-select --installとタイプし、xcodeのインストールをやり直します。
そうすることでherokuCLIをインストールできるようになります。
バージョン確認します。
コマンド
xcode-select --version
~/Desktop/QRMenu/qrmenu_react $ xcode-select --version
xcode-select version 2397.
herokuのバージョン確認します。
コマンド
heroku --version

herokuにターミナルでログインします。
コマンド
heroku login

なんでもいいからタイプしろと言われるのでエンターキーを押します。

ブラウザでログイン画面が起動しますので、herokuにログインして下さい。

ターミナルで「Logged in」と出ればログイン成功です。

heroku git:remoteコマンドを使用して、ローカルリポジトリにアプリケーションを追加します。
コマンドの最後にHerokuで作成したアプリの名前を入れてください。
例えばアプリケーション名が「gighubjapan」だった場合、コマンドは「heroku git:remote -a gighubjapan 」となります。
コマンド
heroku git:remote -a アプリケーション名
git remote -vコマンドで追加したアプリケーション名が表示されるのを確認してください。
コマンド
git remote -v

Herokuにpushします。
コマンド
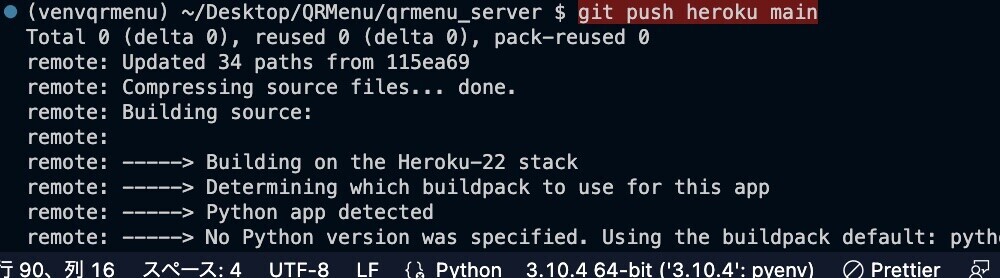
Rails6.1で作成したアプリケーションをherokuにPushする際、ここでバンドラーのエラーが出ます。
remote:        Running: BUNDLE_WITHOUT='development:test' BUNDLE_PATH=vendor/bundle BUNDLE_BIN=vendor/bundle/bin BUNDLE_DEPLOYMENT=1 bundle install -j4
remote:        Your bundle only supports platforms ["x86_64-darwin-22"] but your local platform
remote:        is x86_64-linux. Add the current platform to the lockfile with
remote:        `bundle lock --add-platform x86_64-linux` and try again.
remote:        Bundler Output: Your bundle only supports platforms ["x86_64-darwin-22"] but your local platform
remote:        is x86_64-linux. Add the current platform to the lockfile with
remote:        `bundle lock --add-platform x86_64-linux` and try again.
remote:
remote:  !
remote:  !     Failed to install gems via Bundler.
remote:  !
remote:  !     Push rejected, failed to compile Ruby app.
remote:
remote:  !     Push failed
このような時は、BundlerのバージョンをロックしてHerokuに知らせてあげるとエラーが出ないようになります。
コマンド
bundle lock --add-platform x86_64-linux
こうすることでGemfile.lockが更新されます。
その後「bundle update」を行います。
コマンド
bundle update
更新されたGemfile.lockファイルを、GitHubにコミットしてください。
この状態でherokuにpushすると、dropzoneが見つからないというエラーがでます。
remote:        Compiling...
remote:        Compilation failed:
remote:        ModuleNotFoundError: Module not found: Error: Can't resolve 'dropzone' in '/tmp/build_d32e2ded/app/javascript/packs'
コンパイルテスト時には出ませんでしたが、herokuの環境ではやはりWebpackがうまく読み込めないようです。
dropzoneもCDN経由で動かしているので、「app/javascript/packs/application.js」ファイルの「window.Dropzone = require("dropzone")」の記述を削除しても問題ありません。
「window.Dropzone = require("dropzone")」の記述を削除してもう一度GitHubにコミットしてください。
また、以下のようなエラーに遭遇することがあります。
remote: -----> Build failed
remote:  !     Two different lockfiles found: package-lock.json and yarn.lock
remote:
remote:        Both npm and yarn have created lockfiles for this application,
remote:        but only one can be used to install dependencies. Installing
remote:        dependencies using the wrong package manager can result in missing
remote:        packages or subtle bugs in production.
remote:
remote:        - To use npm to install your application's dependencies please delete
remote:          the yarn.lock file.
remote:
remote:          $ git rm yarn.lock
remote:
remote:        - To use yarn to install your application's dependencies please delete
remote:          the package-lock.json file.
remote:
remote:          $ git rm package-lock.json
remote:
remote:        https://help.heroku.com/0KU2EM53
remote:
remote:  !     Push rejected, failed to compile Node.js app.
remote:
remote:  !     Push failed
これは、lockfile が「package-lock.json」と「yarn.lock」の2種類があって、どちらを見ればいいか分かりませんというエラーです。
このアプリケーションでは「yarn」を利用しているため、GitHubにコミットした「package-lock.json」ファイルを削除します。
このチュートリアル通りにアプリケーションを作成していれば、出ないエラーだと思われます。
コマンド 2つ
git rm package-lock.json
git commit -m "Remove npm lock file"

その後、一度GitHubにコミットする必要があります。
これで無事HerokuにPushすることが出来ます。
remote: ###### WARNING:
remote:
remote:        No Procfile detected, using the default web server.
remote:        We recommend explicitly declaring how to boot your server process via a Procfile.
remote:        https://devcenter.heroku.com/articles/ruby-default-web-server
remote:
remote:
remote: -----> Discovering process types
remote:        Procfile declares types     -> (none)
remote:        Default types for buildpack -> console, rake, web
remote:
remote: -----> Compressing...
remote:        Done: 142.9M
remote: -----> Launching...
remote:        Released v4
remote:        https://gighubjapan-ef33d683140c.herokuapp.com/ deployed to Heroku
remote:
remote: Verifying deploy... done.
To https://git.heroku.com/gighubjapan.git
 * [new branch]      main -> main
もう一つの方法を書いておきます。
herokuのページにログインし、「Deploy」の「GitHub」をクリックします。

「ConnectTo GitHub」をクリックします。

「Authorize Heroku」をクリックします。

パスワードを入力し、レポジトリ名を入力後検索します。
レポジトリが出てきたらConnectをクリックします。

一番下の「Deploy branch」をクリックし、デプロイします。

成功メッセージが出ればOKです。

【50 | コンパイルテスト】 << 【ホーム】 >> 【52 | Heroku postgresの設定】
↓↓クリックして頂けると励みになります。