↓↓クリックして頂けると励みになります。

Google認証を実現するために、OmniAuthというGemを使用することが一般的です。
Google Cloud PlatformにGoogleアカウントでログインしてAPIキーを取得してください。
手順は以下の通りにお願いします。
mrradiology.hatenablog.jp
最初に、GemfileにOmniAuthとOmniAuth-Google-OAuth2を追加します。
これらのGemは、Google認証を簡単に実装するのに役立ちます。
GemFileに以下の記述を追加します。
記述追加 GemFile(67行目)
gem 'omniauth', '~> 1.9'
gem 'omniauth-google-oauth2', '~> 0.8.2'
Gemを追加したら、ターミナルでbundle installコマンドを実行して、Gemをインストールします。
コマンド
bundle
ユーザテーブルにプロバイダー認証のカラムを追加します。
コマンド(2つ)
rails g migration AddGoogleColumsToUser provider uid image
rails db:migrate
「config\initializers\devise.rb」に以下の記述を追加します。
記述追加 config\initializers\devise.rb
「クライアントID」と「クライアントシークレット」はご自分のものを入れて下さい。
  #クライアントID
  #クライアントシークレット
  config.omniauth :google_oauth2,
    'ご自分のクライアントIDを入れてください',
    'ご自分のクライアントシークレットを入れてください',
    {access_type: "offline", approval_prompt: "", skip_jwt: true}
「app\models\user.rb」ファイルに以下の記述を追加します。
1.6行目に「, :omniauthable」の記述を追加
  devise :database_authenticatable, :registerable,
         :recoverable, :rememberable, :validatable,
         :confirmable, :omniauthable
2.記述追加 app\models\user.rb(11行目)
  def self.from_omniauth(auth)
    user = User.where(email: auth.info.email).first

    if user
      return user
    else
      where(provider: auth.provider, uid: auth.uid).first_or_create do |user|
        user.email = auth.info.email
        user.password = Devise.friendly_token[0, 20]
        user.full_name = auth.info.name   # ユーザーモデルに名前があると仮定
        user.image = auth.info.image # ユーザーモデルに画像があると仮定

        user.uid = auth.uid
        user.provider = auth.provider

      end
    end
  end
記述追加 app\models\user.rb
class User < ApplicationRecord
  # Include default devise modules. Others available are:
  # :confirmable, :lockable, :timeoutable, :trackable and :omniauthable
  devise :database_authenticatable, :registerable,
         :recoverable, :rememberable, :validatable,
         :confirmable, :omniauthable

  #長さ50文字以下 入力必須
  validates :full_name, presence: true, length: {maximum: 50}

  def self.from_omniauth(auth)
    user = User.where(email: auth.info.email).first
    if user
      return user
    else
      where(provider: auth.provider, uid: auth.uid).first_or_create do |user|
        user.email = auth.info.email
        user.password = Devise.friendly_token[0, 20]
        user.full_name = auth.info.name   # ユーザーモデルに名前があると仮定
        user.image = auth.info.image # ユーザーモデルに画像があると仮定
        user.uid = auth.uid
        user.provider = auth.provider
      end
    end
  end

end
「app\controllers」フォルダに「omniauth_callbacks_controller.rb」ファイルを新規作成して下さい。
app\controllers\omniauth_callbacks_controller.rb(新規作成したファイル)
class OmniauthCallbacksController < Devise::OmniauthCallbacksController
    def google_oauth2
      # 以下のメソッドをモデルに実装する必要があります(app/models/user.rb)
      @user = User.from_omniauth(request.env['omniauth.auth'])

      if @user.persisted?
        flash[:notice] = I18n.t 'devise.omniauth_callbacks.success', kind: 'Google'
        sign_in_and_redirect @user, event: :authentication
      else
        session['devise.google_data'] = request.env['omniauth.auth'].except(:extra)
        redirect_to new_user_registration_url, alert: @user.errors.full_messages.join("\n")
      end
    end

    def failure
      redirect_to root_path
    end
end
「Googleでログイン」ボタンをつけます。
「app\views\devise\sessions\new.html.erb」ファイルに以下の記述を追加します。
記述追加 app\views\devise\sessions\new.html.erb
<%= link_to "Googleで登録", user_google_oauth2_omniauth_authorize_path, class: "btn btn-primary w-100" %>
「app\views\devise\registrations\new.html.erb」ファイルにも以下の記述を追加します。
記述追加 app\views\devise\registrations\new.html.erb(37行目)
<%= link_to "Googleでログイン", user_google_oauth2_omniauth_authorize_path, class: "btn btn-primary w-100" %>
ルートを追加します。
「config\routes.rb」ファイルの記述を以下のように追加更新します。
追加更新 config\routes.rb(6行目)
  devise_for :users,
              path: '',
              path_names: {sign_up: 'register', sign_in: 'login', edit: 'profile', sign_out: 'logout'},
              controllers: {omniauth_callbacks: 'omniauth_callbacks', registrations: 'registrations'}
「app\controllers」フォルダに「registrations_controller.rb」ファイルを新規作成します。
app\controllers\registrations_controller.rb(新規作成したファイル)
class RegistrationsController < Devise::RegistrationsController
    protected
    def update_resource(resource, params)
        resource.update_without_password(params)
    end
end
ブラウザ確認
http://localhost:3000/register

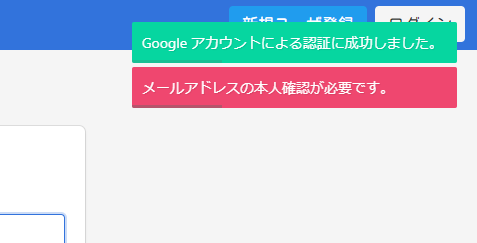
Google認証でのユーザ登録もアカウント有効化が必要です。

Google認証でログインするとプロバイダカラムにデータが格納されます。

↓↓クリックして頂けると励みになります。