↓↓クリックして頂けると励みになります。
【26 | Facebook認証】 << 【ホーム】 >> 【28 | 予約】
Google認証を実現するために、OmniAuthというGemを使用することが一般的です。
さらにGoogle Cloud PlatformでAPIキーを取得する必要があります。
まずはGoogle Cloud PlatformにGoogleアカウントでログインしてAPIキーを取得してください。
手順は以下の通りにお願いします。
mrradiology.hatenablog.jp
APIキーを取得したら、GemfileにOmniAuthとOmniAuth-Google-OAuth2を追加します。
これらのGemは、Google認証を簡単に実装するのに役立ちます。
gem 'omniauth'はFaceBook認証設定時にインストールしてあるので、gem 'omniauth-google-oauth2'のみ追加します。
GemFileに以下の記述を追加します。
記述追加 GemFile(67行目)
gem 'omniauth-google-oauth2', '~> 1.1', '>= 1.1.1'
Gemを追加したら、ターミナルでbundle installコマンドを実行して、Gemをインストールします。
コマンド
bundle
ユーザテーブルにプロバイダー認証のカラムが必要ですが、これもFaceBook認証の実装時に追加してありますので追加する必要はありません。
「config\initializers\devise.rb」に以下の記述を追加します。
記述追加 config\initializers\devise.rb321行目
「クライアントID」と「クライアントシークレット」はご自分のものを入れて下さい。
  #クライアントID
  #クライアントシークレット
  config.omniauth :google_oauth2,
    'ご自分のクライアントIDを入れてください',
    'ご自分のクライアントシークレットを入れてください',
    {access_type: "offline", approval_prompt: "", skip_jwt: true}
「app\models\user.rb」ファイルの設定もFaceBook認証時に設定した内容と同じですので、今回は設定する必要がありません。
FaceBook認証時に作成した「app\controllers\omniauth_callbacks_controller.rb」ファイルに以下の記述を追加します。
    def google_oauth2
      # 以下のメソッドをモデルに実装する必要があります(app/models/user.rb)
      @user = User.from_omniauth(request.env['omniauth.auth'])

      if @user.persisted?
        flash[:notice] = I18n.t 'devise.omniauth_callbacks.success', kind: 'Google'
        sign_in_and_redirect @user, event: :authentication
      else
        session['devise.google_data'] = request.env['omniauth.auth'].except(:extra)
        redirect_to new_user_registration_url, alert: @user.errors.full_messages.join("\n")
      end
    end
app\controllers\omniauth_callbacks_controller.rb15行目
class OmniauthCallbacksController < Devise::OmniauthCallbacksController
    def facebook

      @user = User.from_omniauth(request.env["omniauth.auth"])

      if @user.persisted?
        sign_in_and_redirect @user, event: :authentication # @userがアクティブ化されていない場合
        set_flash_message(:notice, :success, kind: "Facebook") if is_navigational_format?
      else
        session["devise.facebook_data"] = request.env["omniauth.auth"]
        redirect_to new_user_registration_url
      end
    end

    def google_oauth2
        # 以下のメソッドをモデルに実装する必要があります(app/models/user.rb)
        @user = User.from_omniauth(request.env['omniauth.auth'])

        if @user.persisted?
          flash[:notice] = I18n.t 'devise.omniauth_callbacks.success', kind: 'Google'
          sign_in_and_redirect @user, event: :authentication
        else
          session['devise.google_data'] = request.env['omniauth.auth'].except(:extra)
          redirect_to new_user_registration_url, alert: @user.errors.full_messages.join("\n")
        end
    end

    def failure
      redirect_to root_path
    end
end
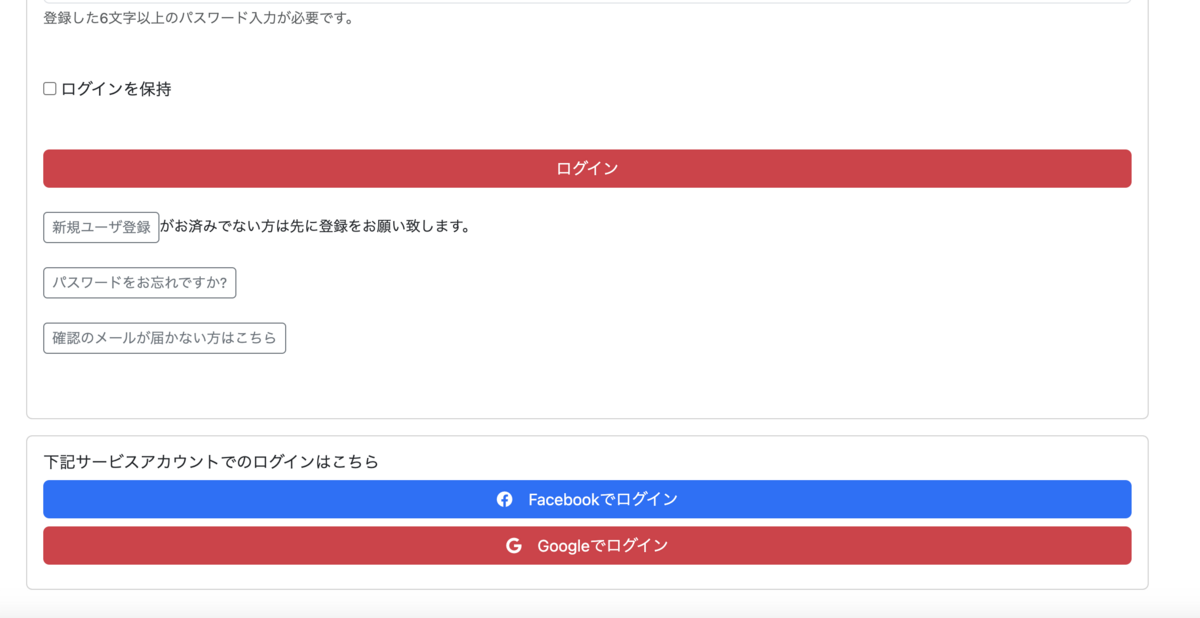
「Googleでログイン」ボタンをつけます。
「app\views\devise\sessions\new.html.erb」ファイルに以下の記述を追加します。
記述追加 app\views\devise\sessions\new.html.erb53行目
          <div class="mb-2 mt-2">
            <%= link_to user_google_oauth2_omniauth_authorize_path, class: "btn btn-danger w-100" do %>
              <i class="fa-brands fa-google"></i><span style="margin-left: 1rem;">Googleでログイン</span>
            <% end %>
          </div>
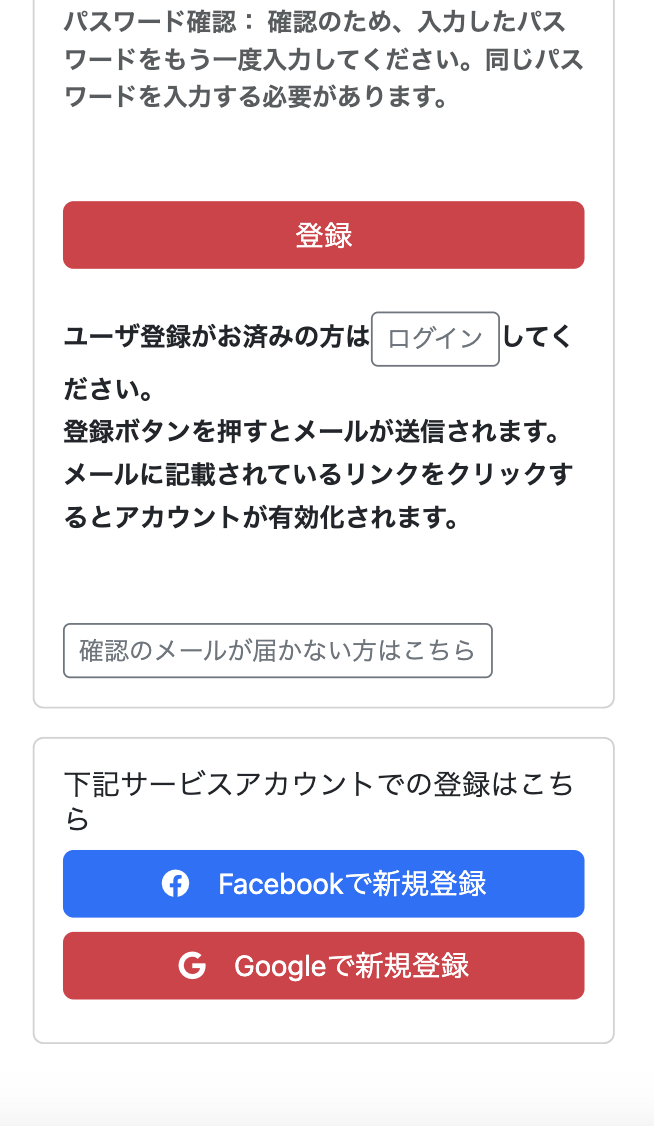
「app\views\devise\registrations\new.html.erb」ファイルにも以下の記述を追加します。
記述追加 app\views\devise\registrations\new.html.erb(59行目)
          <div class="mb-2 mt-2">
            <%= link_to user_google_oauth2_omniauth_authorize_path, class: "btn btn-danger w-100" do %>
              <i class="fa-brands fa-google"></i><span style="margin-left: 1rem;">Googleで新規登録</span>
            <% end %>
          </div>
記述追加 【app\views\devise\registrations\new.html.erb】57行目
<div class="container px-4 mt-4">
  <div class="row gx-5">
    <div class="col">

      <div class="card w-100 mb-3">
        <div class="card-body">
          <h5 class="card-title text-danger h3"><strong><span>新規登録</span></strong></h5>
          <p class="card-text"><strong>ユーザー登録おねがいしやす</p>

          <%= form_for(resource, as: resource_name, url: registration_path(resource_name)) do |f| %>

            <div class="mb-5 mt-5">
              <label for="exampleInputEmail1">氏名</label>
              <%= f.text_field :full_name, autofocus: true, placeholder: "氏名", class: "form-control" %>
              <div id="emailHelp" class="form-text">氏名を必ず登録しましょ</div>
            </div>

            <div class="mb-5">
              <label for="exampleInputEmail1">Eメールアドレス</label>
              <%= f.email_field :email, autofocus: true, placeholder: "Eメールアドレス", class: "form-control" %>
              <div id="emailHelp" class="form-text">メルアドは絶対</div>
            </div>

            <div class="mb-3">
              <label for="exampleInputEmail1" class="ttl">パスワード</label>
              <%= f.password_field :password, autocomplete: "off", placeholder: "パスワード", class: "form-control" %>
              <div id="emailHelp" class="form-text">強力なセキュリティを確保するために、最低でも6文字以上のパスワードが必要です。</div>
            </div>

            <div class="mb-5">
              <label for="exampleInputEmail1" class="ttl">パスワード確認</label>
              <%= f.password_field :password_confirmation, autocomplete: "off", placeholder: "パスワード確認", class: "form-control" %>
              <div id="emailHelp" class="form-text">パスワード確認: 確認のため、入力したパスワードをもう一度入力してください。同じパスワードを入力する必要があります。</div>
            </div>


              <%= f.submit "登録", class: "btn btn-danger w-100" %>

          <% end %>

          <div class="mt-4">
            <%= render "devise/shared/links" %>
          </div>

        </div>
      </div>

      <!--  SNS認証 -->
      <div class="card w-100 mb-5">
        <div class="card-body">
          <h5 class="card-title text-dark h6">下記サービスアカウントでの登録はこちら</h5>
          <div>
            <%= link_to user_facebook_omniauth_authorize_path, class: "btn btn-primary w-100" do %>
              <i class="fa-brands fa-facebook"></i><span style="margin-left: 1rem;">Facebookで新規登録</span>
            <% end %>
          </div>
          <div class="mb-2 mt-2">
            <%= link_to user_google_oauth2_omniauth_authorize_path, class: "btn btn-danger w-100" do %>
              <i class="fa-brands fa-google"></i><span style="margin-left: 1rem;">Googleで新規登録</span>
            <% end %>
          </div>
        </div>
      </div>

    </div>
  </div>
</div>
ルートの設定もFaceBook認証の時に設定しましたので、そのままで大丈夫です。
「app\controllers\registrations_controller.rb」ファイルもFaceBook認証の設定時に作成してありますので、そのままで大丈夫です。
ブラウザを確認します。
ブラウザ確認
http://localhost:3000/register


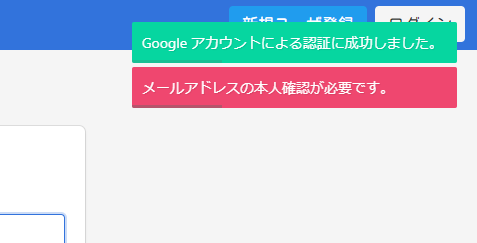
Google認証でのユーザ登録もアカウント有効化が必要です。

Google認証でログインするとプロバイダカラムにデータが格納されます。

【26 | Facebook認証】 << 【ホーム】 >> 【28 | 予約】
↓↓クリックして頂けると励みになります。
