[20]仕事コントローラ << [ホームに戻る] >> [22]仕事登録
仕事ビューを作成していきます。
「app\views\gigs\new.html.erb」ファイルの記述を以下の内容に変更します。
app\views\gigs\new.html.erb
<section class="section">
  <div class="container">
    <div class="steps" id="stepsDemo">

      <!-- 5つのステップ -->
      <div class="step-item is-active is-primary">
        <div class="step-marker">1</div>
        <div class="step-details">
          <p class="step-title">概要</p>
        </div>
      </div>
      <div class="step-item">
        <div class="step-marker">2</div>
        <div class="step-details">
          <p class="step-title">価格</p>
        </div>
      </div>
      <div class="step-item">
        <div class="step-marker">3</div>
        <div class="step-details">
          <p class="step-title">お仕事の内容</p>
        </div>
      </div>
      <div class="step-item">
        <div class="step-marker">4</div>
        <div class="step-details">
          <p class="step-title">写真</p>
        </div>
      </div>
      <div class="step-item">
        <div class="step-marker">5</div>
        <div class="step-details">
          <p class="step-title">公開</p>
        </div>
      </div>

      <!-- お仕事登録フォーム-->
      <%= form_for @gig, html: {class: "steps-content m-l-100 m-r-100"} do |f| %>
        <div class="field">
            <label class="label">お仕事の名前</label>
            <%= f.text_area :title, autocomplete: "title", class: "textarea" %>
        </div>
        <div class="field">
            <label class="label">カテゴリー</label>
            <%= f.select(:category_id, options_for_select(@categories.map{ |c| [c.name, c.id] })) %>
        </div>
        <div class="field is-grouped is-grouped-centered m-t-25">
            <a href="" data-nav="previous" class="button is-light">キャンセル</a>
            <%= f.submit "保存して続ける", class: "button is-primary" %>
        </div>

      <% end %>
    </div>
  </div>
</section>
「app\views\gigs\create.html.erb」ファイルと「app\views\gigs\update.html.erb」ファイルは使わないので削除して大丈夫です。
ブラウザ確認
http://localhost:3000/gigs/new

テストでカテゴリー登録していくのが面倒なので「faker」を使います。
fakerのGitHubページは以下を見て下さい。
github.com
GemFileに以下の記述を追加します。
記述追加 GemFile(74行目)
gem 'faker', '=1.9.3'
GemFile
source 'https://rubygems.org'
git_source(:github) { |repo| "https://github.com/#{repo}.git" }

ruby '2.6.3'

# Bundle edge Rails instead: gem 'rails', github: 'rails/rails'
gem 'rails', '~> 6.0.3'
# Use postgresql as the database for Active Record
gem 'pg', '>= 0.18', '< 2.0'
# Use Puma as the app server
gem 'puma', '~> 4.1'
# Use SCSS for stylesheets
gem 'sass-rails', '>= 6'
# Transpile app-like JavaScript. Read more: https://github.com/rails/webpacker
gem 'webpacker', '~> 4.0'
# Turbolinks makes navigating your web application faster. Read more: https://github.com/turbolinks/turbolinks
gem 'turbolinks', '~> 5'
# Build JSON APIs with ease. Read more: https://github.com/rails/jbuilder
gem 'jbuilder', '~> 2.7'
# Use Redis adapter to run Action Cable in production
# gem 'redis', '~> 4.0'
# Use Active Model has_secure_password
# gem 'bcrypt', '~> 3.1.7'

# Use Active Storage variant
# gem 'image_processing', '~> 1.2'

# Reduces boot times through caching; required in config/boot.rb
gem 'bootsnap', '>= 1.4.2', require: false

group :development, :test do
  # Call 'byebug' anywhere in the code to stop execution and get a debugger console
  gem 'byebug', platforms: [:mri, :mingw, :x64_mingw]
end

group :development do
  # Access an interactive console on exception pages or by calling 'console' anywhere in the code.
  gem 'web-console', '>= 3.3.0'
  gem 'listen', '~> 3.2'
  # Spring speeds up development by keeping your application running in the background. Read more: https://github.com/rails/spring
  gem 'spring'
  gem 'spring-watcher-listen', '~> 2.0.0'
end

group :test do
  # Adds support for Capybara system testing and selenium driver
  gem 'capybara', '>= 2.15'
  gem 'selenium-webdriver'
  # Easy installation and use of web drivers to run system tests with browsers
  gem 'webdrivers'
end

# Windows does not include zoneinfo files, so bundle the tzinfo-data gem
gem 'tzinfo-data', platforms: [:mingw, :mswin, :x64_mingw, :jruby]

# Bulma
gem 'bulma-rails', '~> 0.7.4'
gem 'bulma-extensions-rails', '~> 1.0.30'

#デバイス
gem 'devise'

# 日本語化
gem 'rails-i18n'

# facebook認証
gem 'omniauth', '= 1.9.0'
gem 'omniauth-facebook', '= 5.0.0'

# amazon s3
gem "aws-sdk"

# faker
gem 'faker', '=1.9.3'
コマンド
bundle
「db\seeds.rb」ファイルを以下のように編集します。
db\seeds.rb
# This file should contain all the record creation needed to seed the database with its default values.
# The data can then be loaded with the rails db:seed command (or created alongside the database with db:setup).
#
# Examples:
#
#   movies = Movie.create([{ name: 'Star Wars' }, { name: 'Lord of the Rings' }])
#   Character.create(name: 'Luke', movie: movies.first)

# テストカテゴリーを追加(10個)
10.times do
    Category.create(
        name: Faker::Job.unique.field
    )
end

# テストユーザーを追加(5ユーザー パスワードは 123456)
5.times do
    user = User.create(
        full_name: Faker::Name.name,
        email: Faker::Internet.free_email,
        about: Faker::Quote.matz,
        password: '123456',
        from: Faker::Address.country,
        language: Faker::Nation.language,
        created_at: Date.today
    )

    user.avatar.attach(
        io: image = open("https://i.pravatar.cc/300"),
        filename: "avatar#{user.id}.jpg",
        content_type: 'image/jpg'
    )
end
コマンド
rails db:seed
これでテストカテゴリー10個とテストユーザー5ユーザーが追加されました。
テストユーザーのパスワードは「123456」です。
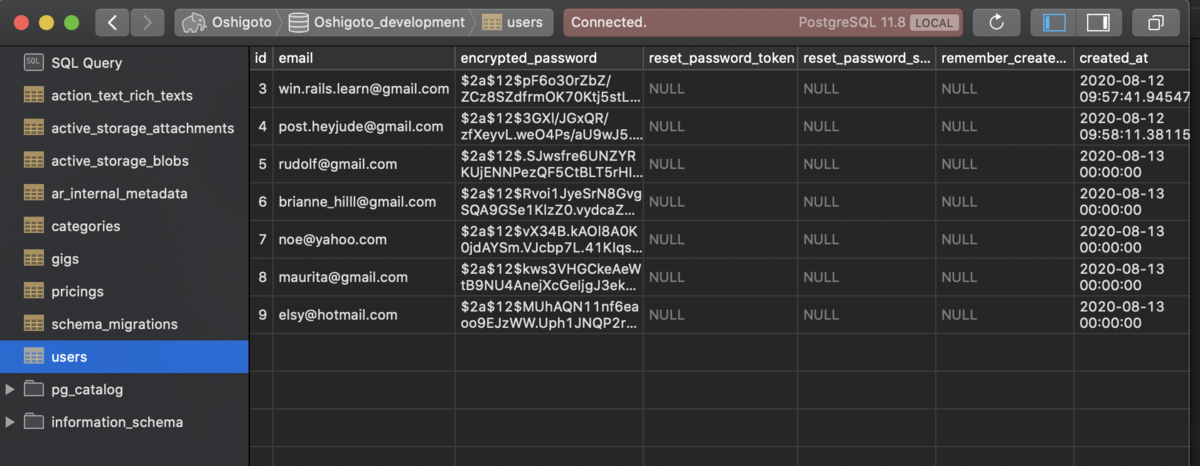
Posticoで確認してみます。

テストユーザでログインしてみます。
メールのアカウント有効化がされていないのでPosticoで有効化します。
「confirmed_at」のカラムに日時をコピーします。
メールが送信されてしまいますがデリバリーエラーで戻ってきます。

これでテストユーザでログインできるようになりました。

↓↓クリックして頂けると励みになります。
[20]仕事コントローラ << [ホームに戻る] >> [22]仕事登録